
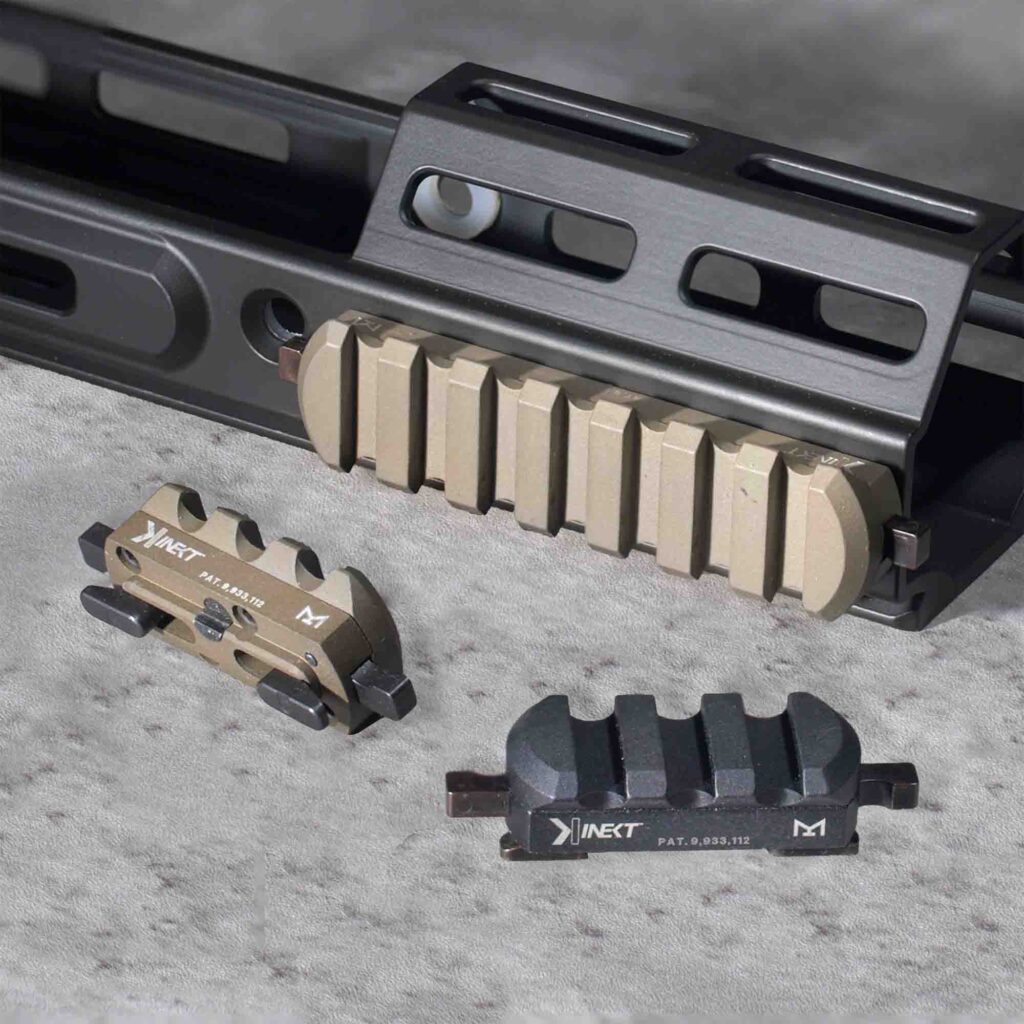


Sidelok Information Sheet
Applies to Sidelok only
Sidelok is a unique mount for a variety of reasons and unlike anything else currently on the market. This information sheet is designed to help understand how sidelok works, proper installation, key components, and simple diagnostics to eliminate common questions & concerns.
Please read through this information guided and follow each step that pertains to you.
Installing onto rail
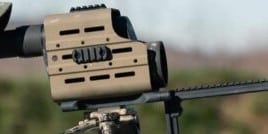
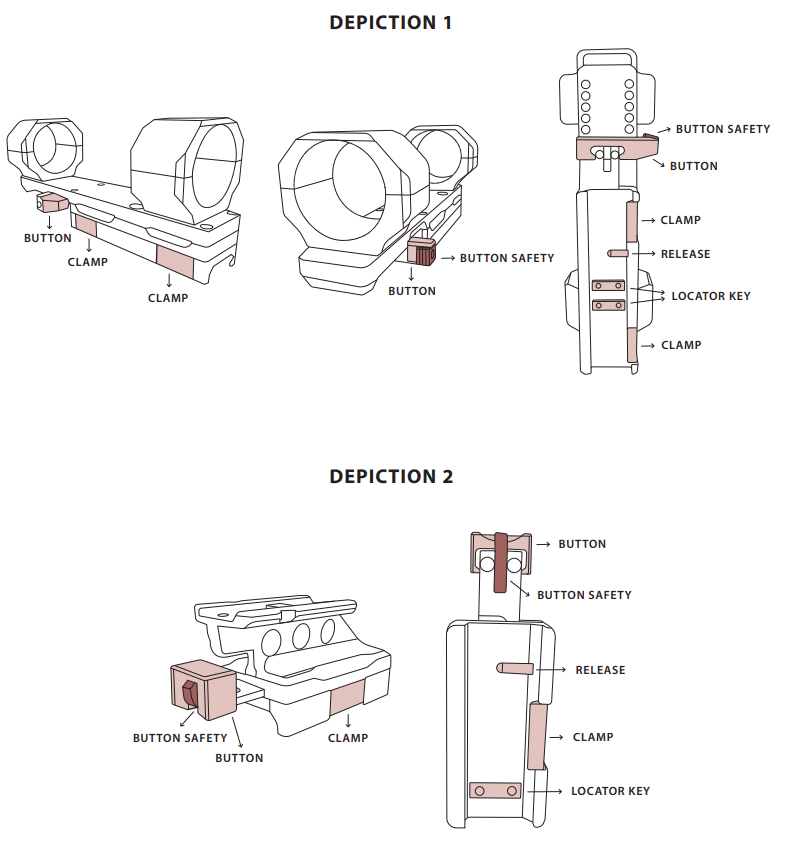
1. Press the button safety and the button inwards until Sidelok clicks and the button remains in the reward position. This is the OPEN position and is ready to be installed.
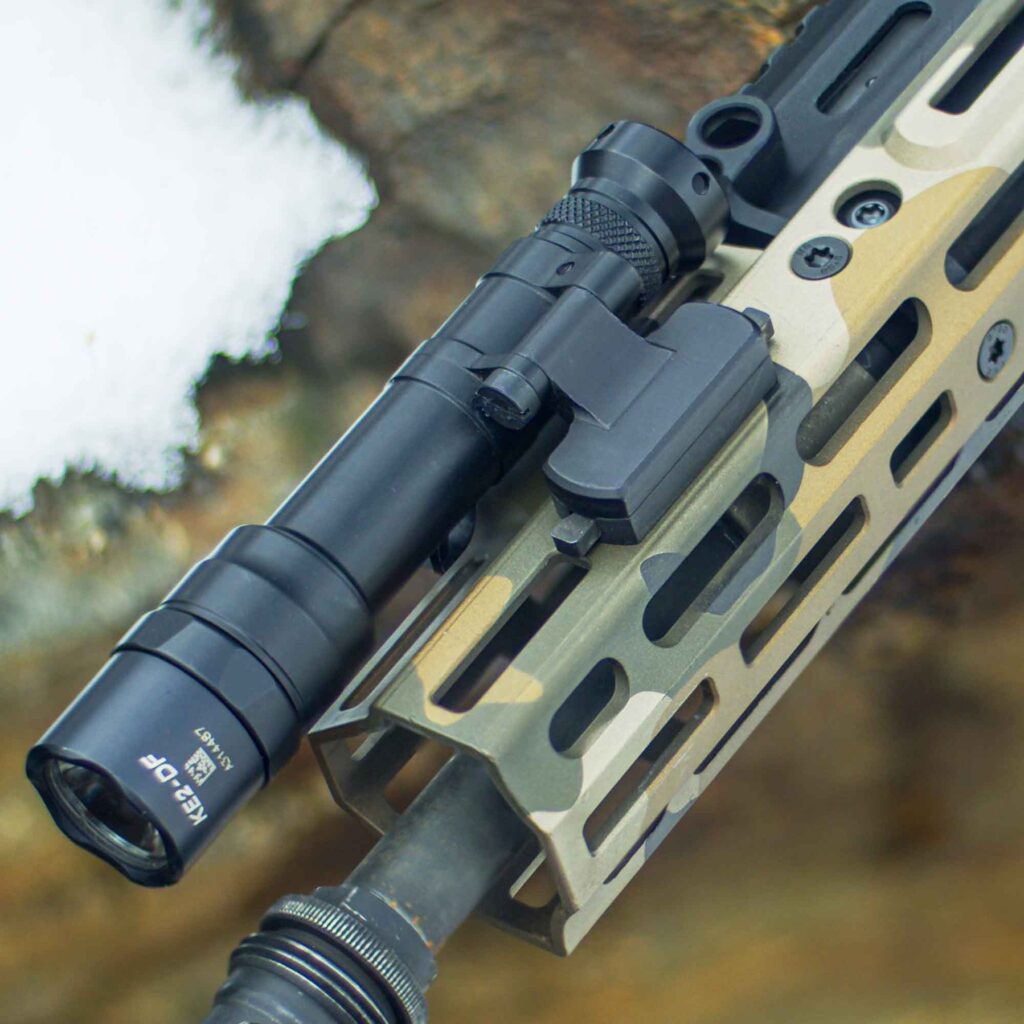
2. With the button facing forward, hold Sidelok at a 45 degree angle to the right of your rail and align the Locator Key(s) with the spacing in between the rail.
3. In one swift motion, rotate Sidelok counterclockwise onto the rail. The button should spring forward, and the Clamp(s) will engage, grabbing onto the rail.
Removing from rail
1. Press the button safety and button forward.
2. In one swift motion, rotate Sidelok clockwise off of and away from the rail. The button should remain locked back in the open position for the next installation
Torque & fasteners
1. When mating an optic with Sidelok always use the manufacturer recommended torque specifications of that specific object
2. Some Sidelok mounts have a separate optics plate that needs to be removed in order to mount your optic. Never exceed 11in-lb when installing the optics plate back onto Sidelok.
3. Never exceed 20in-lb when installing or adjusting scope rings.
4. Always tighten fasteners simultaneously
5. Use common sense and personal judgment. This is your equipment, and these torque specs are in light inch pounds. You dont need to gorilla hand these fasteners.
Things to Know & Consider
1. Sidelok does have a break in period. Although not much and pre-tested from the factory, Sidelok does take some time for all components to get properly lubricated and wear into one another.
2. Sidelok will tighten during recoil. The internal cam system of Sidelok allows the mount to tighten with use. If loose, please try re-installing several times and shooting your firearm before consulting with a customer service rep.
3. Sidelok must be rotated swiftly onto the rail from solid side towards the clamping side (from right to left-counterclockwise). Too gentle of installs may lead to a weak clamping force and movement.
4. The button safety must be completely depressed prior to locking the button open.(Button Safety deactivation is different on scope mounts)
5. Objects should not interfere with the button during installation. If an object, such as a finger, prevents complete deployment of the button during installation then Sidelok may not clamp correctly.
6. Verify your rail! While Sidelok is designed to work with a variety of rail, it was designed for Mil-Spec standards and not guaranteed to work with non-Mil-spec rails.
7. Disassembly. Never attempt to disassemble or repair Sidelok on your own. Doing so will void any and all warranty coverage.
Functions Test
1. Press button safety – it should move freely.
2. Press button without activating the button safety – button should move slightly but not lock open.
3. Press button safety and button to complete rearward until mount locks open – It should move smoothly and click into place. Sidelok should remain in this position.
4. With Sidelok Open, flip Sidelok over: Press the release key – The button should spring forward.
5. Hold the release key down while simultaneously pressing the button in and out several times – Btton and clamps should move freely.
6. Install and remove from rail several times.
Download the PDF Here!